
1. Import your files
Everything starts with your source files. Caliptus references them where they are on disk: importing is instant and your originals are never modified.
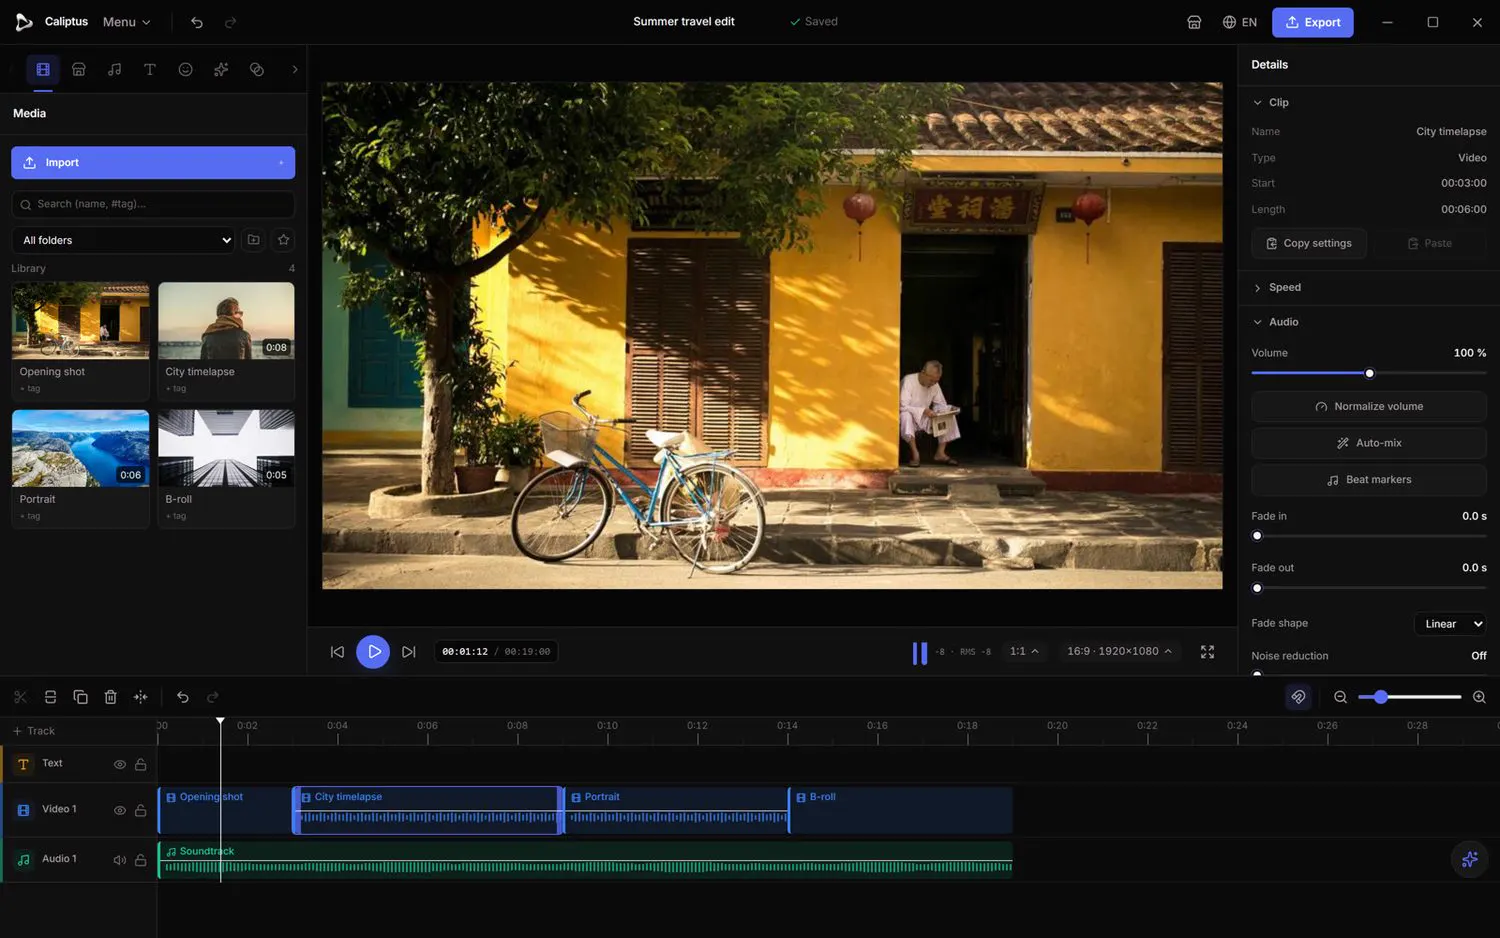
- Open the Media tab in the tool rail.
- Click Import, or drag files straight from your file explorer onto the panel.
- Once imported, drag a media item onto the timeline, or select it and use Add to timeline.
See the full Import & media guide
2. Cut and arrange on the timeline
The timeline is where the edit takes shape: tracks stacked top to bottom, clips laid left to right, and a playhead showing the current frame.
- Move the playhead and click Split (or press S) to cut a clip at that point.
- Select a clip and press Delete to remove it, or use Delete (close gap) to pull the following clips left.
- Toggle Snapping so clips align cleanly to cuts, markers and the playhead.

3. Generate captions
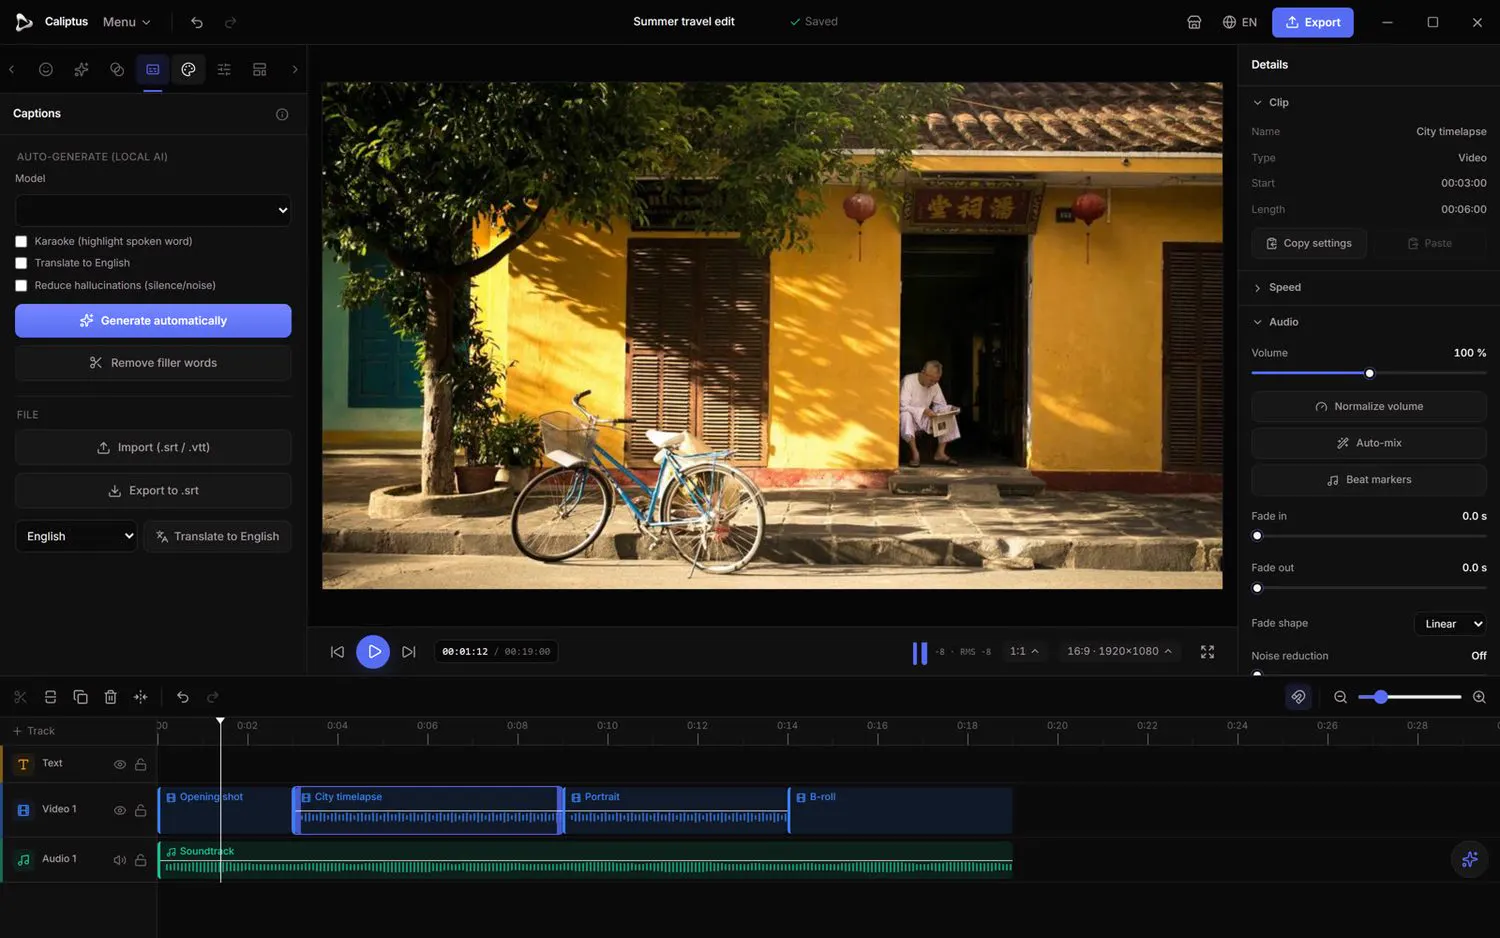
Caliptus transcribes speech into subtitles using a local speech-recognition model. Nothing is uploaded: the audio and the transcription stay on your computer.
- Select a clip that has speech and open the Captions tab.
- Pick a Model. The spoken language is detected automatically.
- Click Generate automatically; the captions are created and placed on the timeline.
4. Export your video
Once the edit is done, export turns your timeline into a finished video file. Caliptus renders on your machine, with simple presets.
- Click Export in the top bar and choose a destination.
- Pick a Preset, or set Resolution, Frame rate, Quality, Codec and Bitrate yourself, then start the export.
See the full Export & delivery guide
What's next?
This tutorial covers just what you need to get your first video out. The reference guide details every tool in the editor, area by area.